Point of Sale Installation and Setup
The Point of Sale can be installed from the Welcome page of ASBWorks.com or via this link: http://downloads.csmcentral.com/
Note: Upon installing your point of sale application, an icon for the CSM Point of Sale will be placed on your desktop. Double click it to complete the printer/card reader set up if needed or to launch the POS and start making sales.
.jpg)

You also always access the Set up and/POS via your Windows start menu:
1. Go to your windows start menu and select all programs
2. Select the folder labeled "CSM Point of Sale"
3. Select "CSM Point of Sale Setup"

General Tab: General is where you will see "ASBWorks Production" as the correct server host, (if it displays something different, please change it to the above).
1. Choose MagTek if using PayPros to process cards at the counter; leave blank if using a third party (like your bank's) card reader.
2. Set the number of receipts to print from the drop down.
3. Set picture import by following directions after clicking Student Picture Location (see POS Picture import for more information).
.jpg)
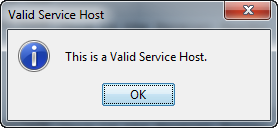
4. Optional- Click "Test Server Host" to confirm that it is a valid host.

Receipt Tab - Select your receipt printer and model from the drop downs, and input your receipt header and footer. Test the receipt printer to make sure a receipt prints (and cash drawer opens if used). Click OK to save and exit the screen.
.jpg)
Printer Settings Tab - Only to be used if printer doesn't print correctly. The column width and lines to skip can be adjusted if needed. Test receipt printer after editing and then Save to keep those settings.
.jpg)
Logging Tab - Use this to enter in your email address if any errors occur and support asks you to send in the logs from your computer.
.jpg)
Copyright © 2010-2019 ASBWorks™